Workbench and Stand
Here's a few bits of shop furniture I've built and my thoughts about what I would do different next time. I figure shop furniture is a great place to learn new techniques without worrying about aesthetics. I often use construction lumber and recycled materials for these.
Miter saw stand
Concept
This was my first attempt at mortise and tenon joints. A friend gave me the cabinet drawers out of a kitchen he was remodeling, which worked perfectly for adding some storage to this project. I used my drill press to hog out the mortises and a set of chisels to clean them up. I built a basic tenon jig for my table saw. Both were pretty rough and I was worried the whole assembly wouldn't go together well after a test fit. I had planned for side panels made from peg board for storing additional tools and sawblades, and once I added these, the whole thing was a lot more stable.
Thoughts
I use the bigger drawers near the bottom for storing various smaller tools and jigs, and the top drawer for all my screws, nails, and other fasteners. I made a simple set of dividers from some MDF and stuck them down in there. This mostly works well, but it is an odd place to put all of those.
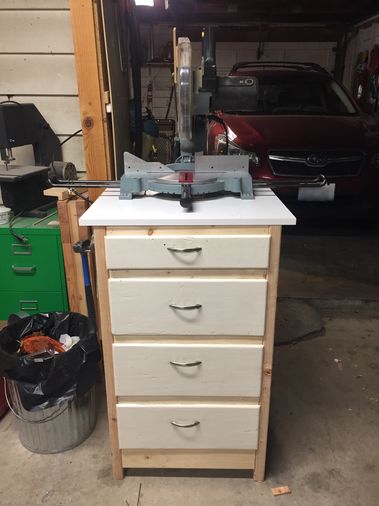
The castors on the bottom are also a bit funky, I had put two with swivels and two without, to save some money, but this arrangement doesn't provide much maneuverability when moving around the shop. As a result, I often end up lifting one side off the ground to roll it around.
Workbench
Concept
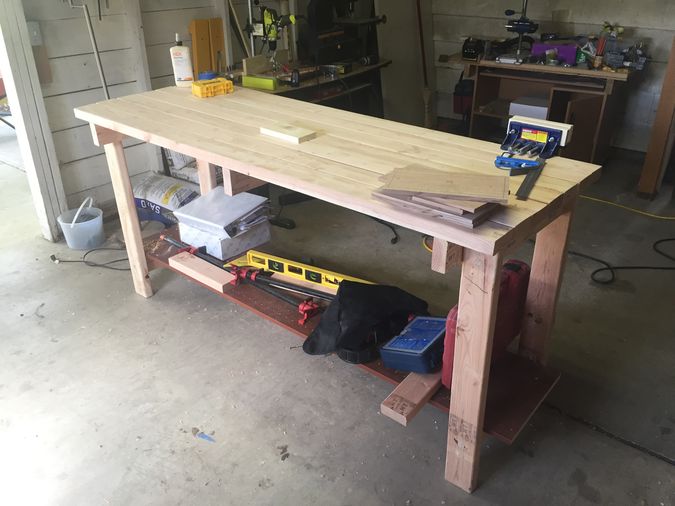
I built this workbench without knowing what I was doing and has grown organically with my needs. The base was inspired by Matthias Wandel's plans while the top was roughly in the english-style bench... but I would call it a picnic table top. I've since added a vise, tool well, more bracing, and some extra shelves.
Thoughts
It's due to be replaced someday as it is a little shakey and the top is slightly warped due to a slight twist to the frame. I've tried planing the top a few times, and it is free of any big bumps, but the warp/twist is a bit of problem when working on large panels. It'll probably get repurposed as another bench for gardening or light metal work when I do replace it. I've since added more bracing to the back to keep it from racking when I am really vigorously planing a piece of wood, and another storage shelf for tools. There is also a tool well off to one side of the bench that I use for storing various bits of workholding gear like bench dogs and holdfasts.
Update - April 2022
I am in the process of replacing the boards ontop of the workbench with some 2x6s on one side to provide a flatter surface for handplaning and provide more space for a planing stop. In the process, I seem to be improving the stiffness of the workbench. It has taken me a couple of one hour sessions to replace the boards.
Vise
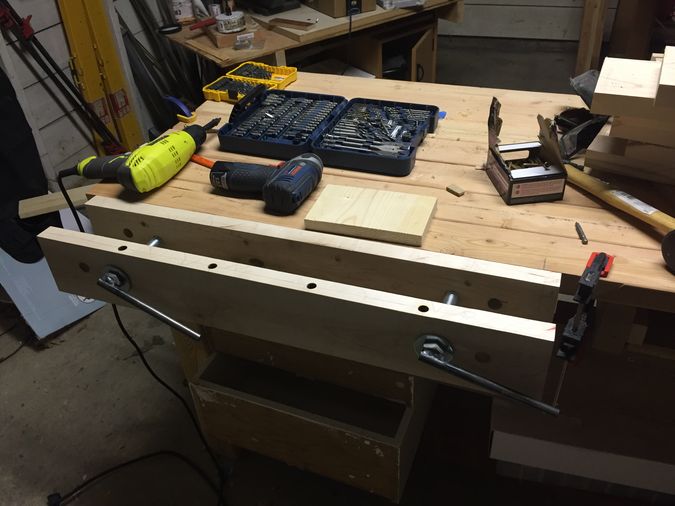
Concept
The Harbor Freight carpenters vise that I started with is great for small pieces, but sticks up over the edge of the bench. To help fix this, I built a very simple vise from a piece of hard maple, and two 8" long 3/4" diameter bolts which a friend welded handles onto. The rough idea was from One Minute Woodworking's video on YouTube, although looking back at it, my plans have the bolts mounted backwards from theirs. It was dirt cheap, the maple might have been the most expensive piece.
Thoughts
It gets plenty of grip for handplaning and helping hold pieces to the bench, but turning both handles to tighten and loosen it can be a little tedious. The handles on the bolts get in the way sometime, next time I would do some kind of wooden knobs and epoxy them on.