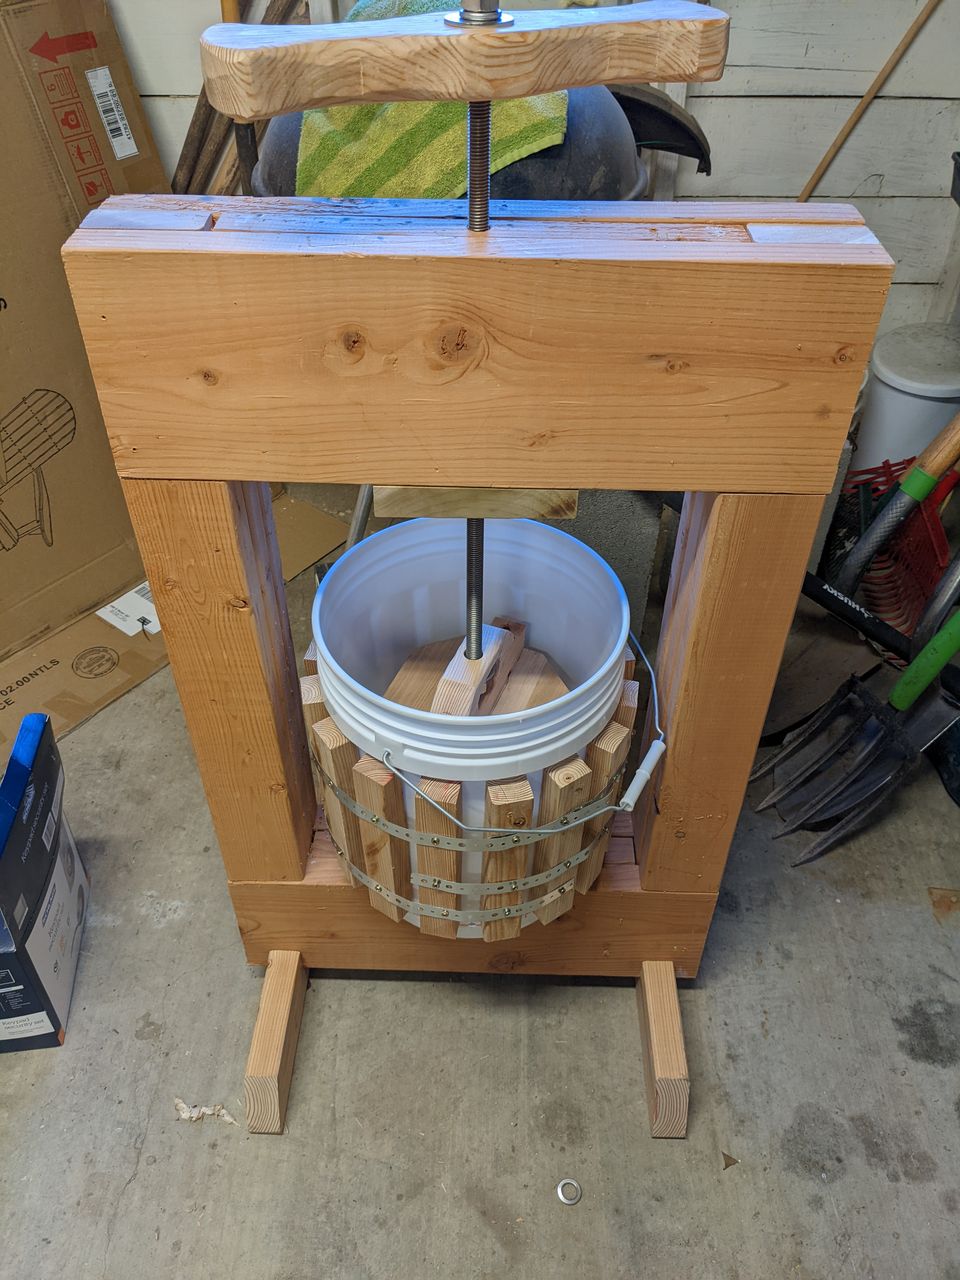
Cider Press
My house came with a beautiful old apple tree in the yard, probably dating to around the time the house was built (1950), which is incredibly prolific, meaning we get more apples than we can ever turn into baked goods and apple sauce in one year. Several times I have tried making some kind of apple cider with the fruit from the tree, using various methods to avoid renting a press.
Living in a winemaking region, I have a number of friends with expertise, but most fruit presses available to me are for 20 or more gallons of fruit at a time. It feels silly to pay to rent one of these, so I wanted to make something a little better scaled for my personal needs.
Here's my account of building a (not-so) quick and dirty cider press. My goal isn't to build the most elegant fruit press ever, just something functional.
Improvising a press screw
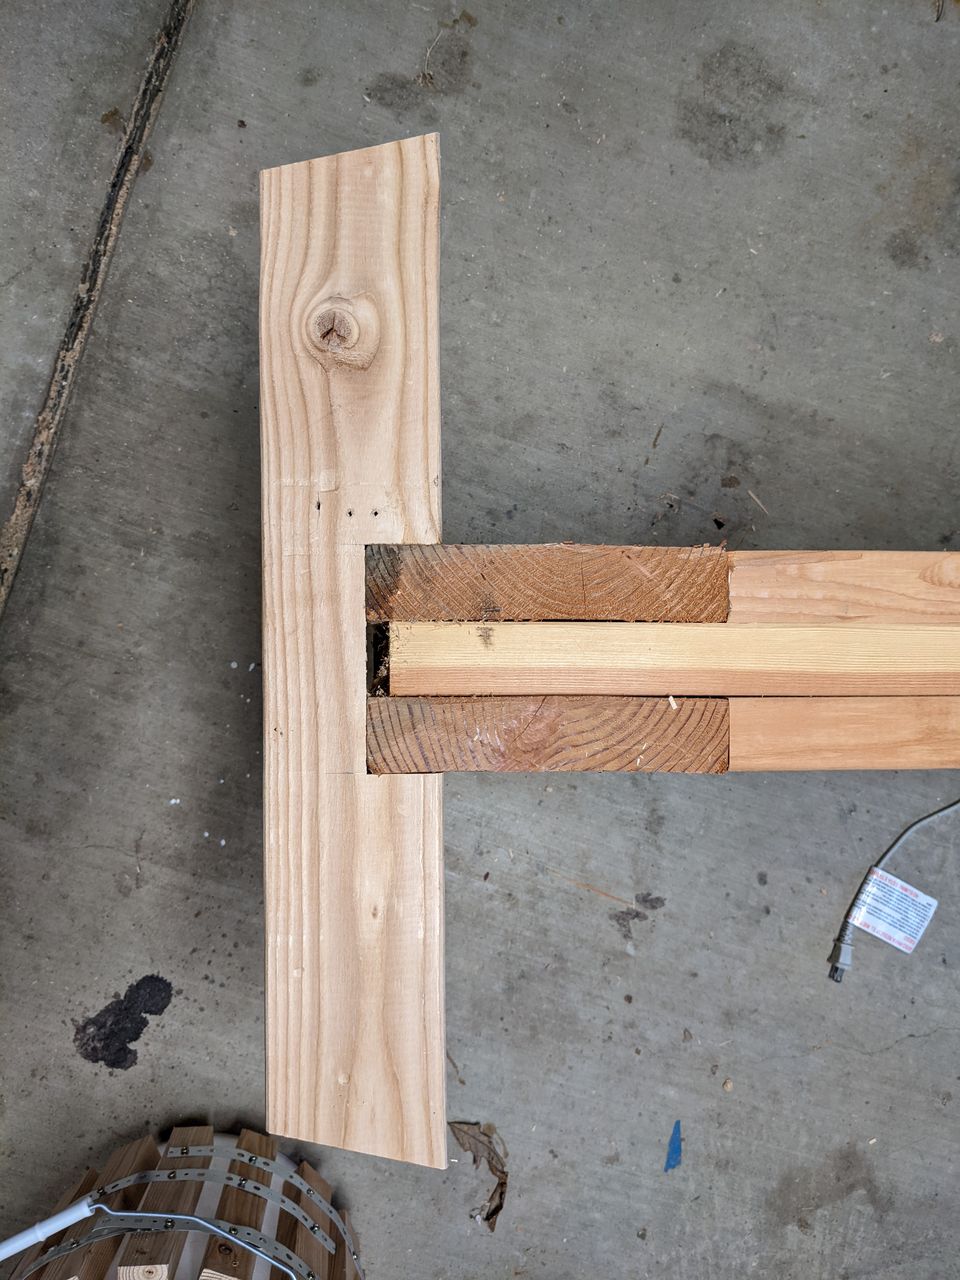
I figure this is one of the more critical pieces, and where I was willing to spend the most money, but also wanted to avoid spending as much as a commercial press would cost to buy. I started building the frame for a press years ago, with the idea to use a scissor jack to provide compression, but discovered that the one in my car wouldn't extend when a five gallon bucket was placed under it. For several years I had considered buying a cheap bench screw online, but most of the ones for sale were too short, 18 inches long or less, which doesn't provide enough depth for this. This weekend I finally broke down and ordered a few critical parts: a 24" 5/8-inch 11-tpi threaded rod made from stainless steel and accompanying nuts and washers.
The resulting press mechanism appears to work really well, or at least more smoothly than I was expecting. One key thing I did was making sure the nut was well aligned with the hole that the threaded rod would go through. I squeezed the nut that sits in the thrust block by first placing the rod in the nut, and then putting this through the thrust block on top of the pre-drilled frame. This gave me a good ~8 inches or so of hole that helped align the whole mechanism as I used a mallet to force the nut into the slightly undersized hole I had drilled and chiseled out for it. Note, don't use too much force here, the first thrust block was made of some cheap construction lumber and split during this step. I made the second one with a piece of heavy elm.
I mounted the thrust block with six countersunk screws, pre-drilling each hole to avoid having this piece crack.
Building the bucket
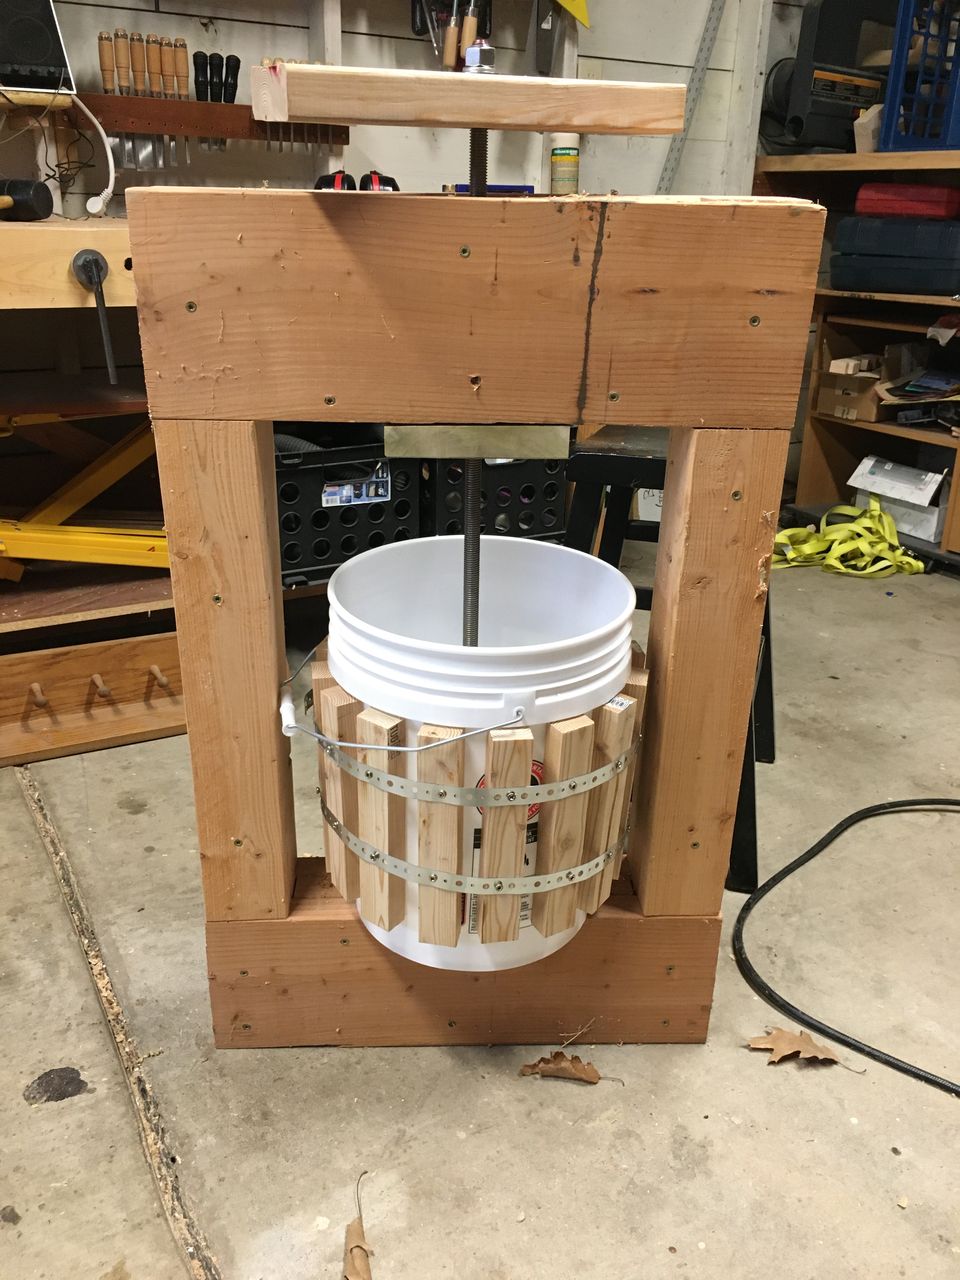
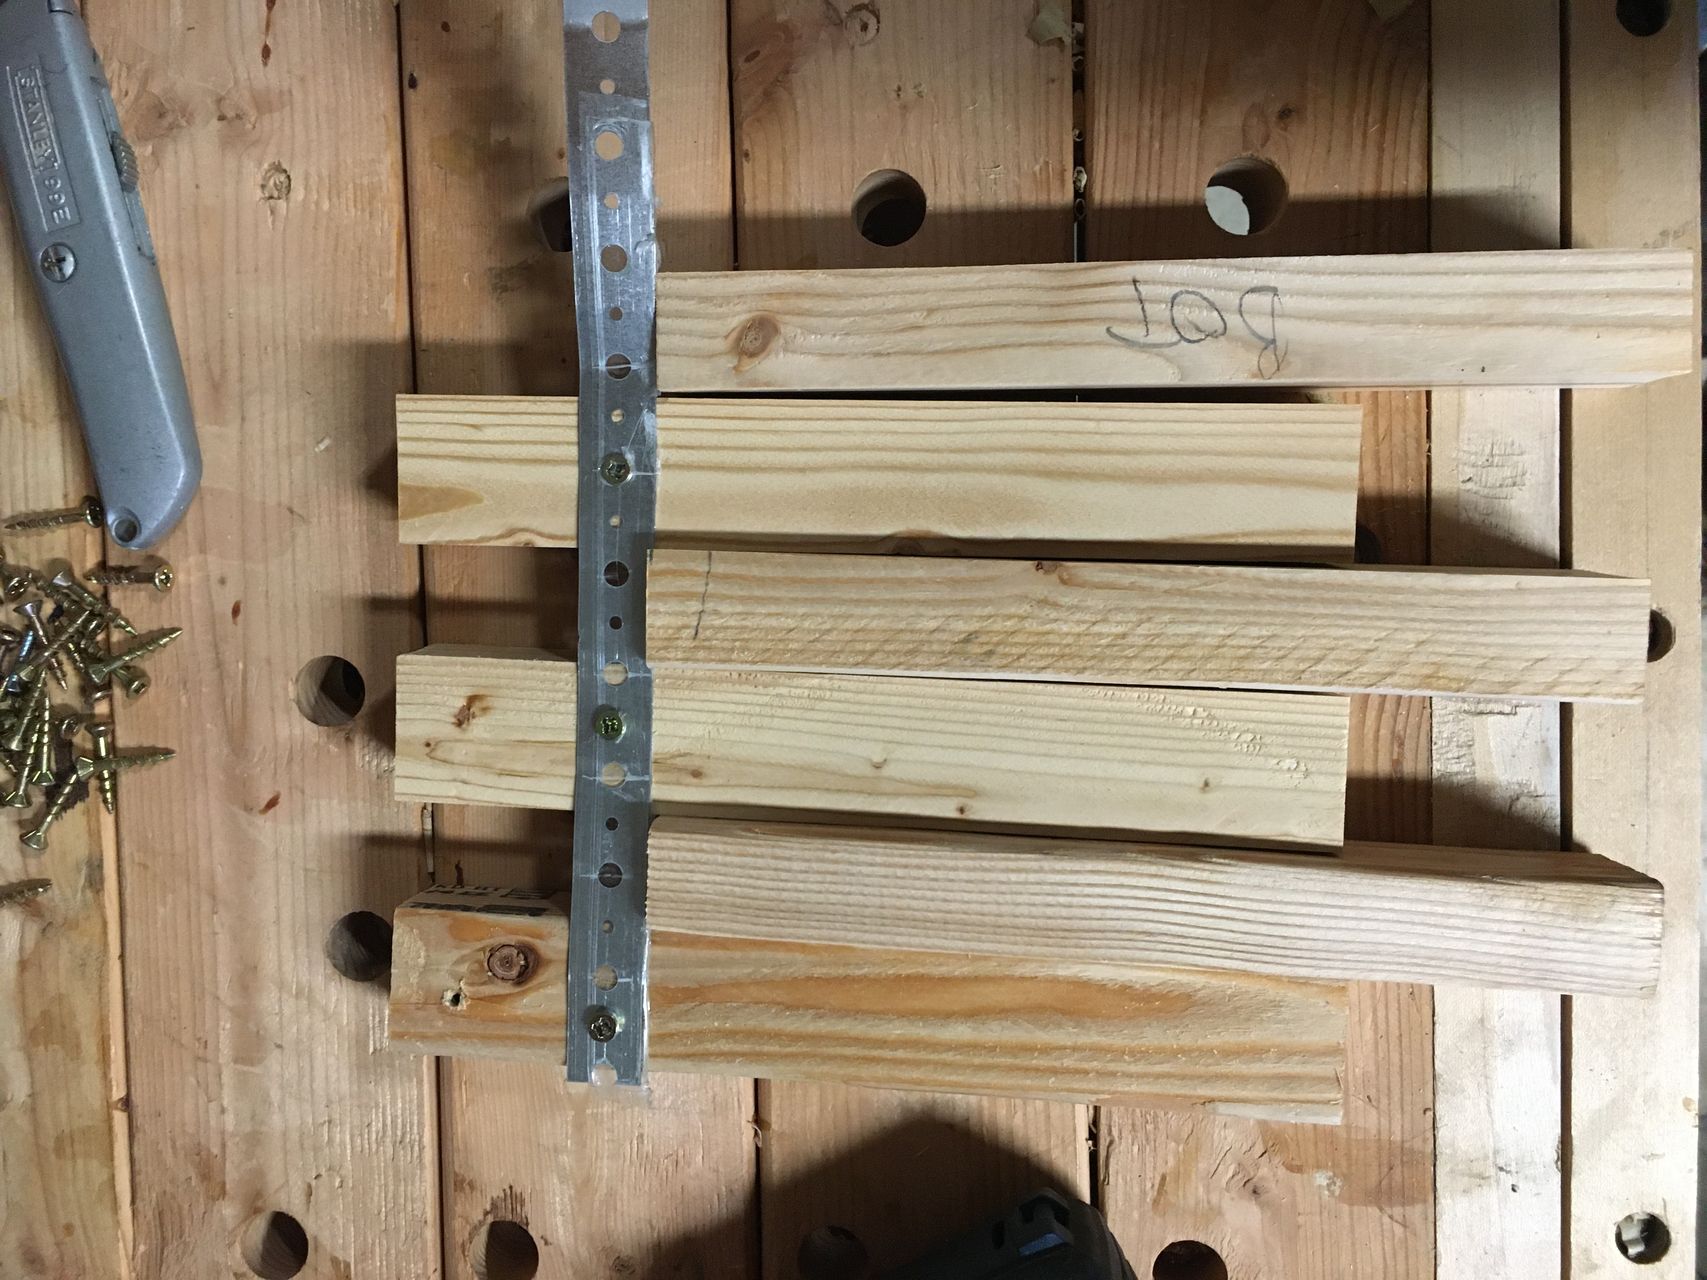
I took a five gallon bucket and attached some wooden staves and metal banding to strengthen it. The staves were made from 1/3 width pieces of 2x4 and spaced evenly around the bucket. The staves were attached to one piece of metal banding while laid out on my workbench, using a strip of wood as a guide to provide even spacing. I then rolled around the bucket before straightening and attaching the second band. These were then pressure fit over the bucket by gently tapping on a mallet until they were snug - I had sized the bands to give about an inch between the rim of the bucket and the top of the staves, giving me some space to tighten it this way but should still be removable.
I drilled holes about every inch around the bottom to let juice out - pretty much one under each stave and between each stave. After testing on another HDPE bucket, I settled on using a brad point bit and taking it really slow. That still produced a few rough edges, so I came back with a countersink bit to help clean those up. The final holes aren't amazing, but clean enough for this use.
Adding feet
Whoops.
I cut out the notch in them using the table saw and chisel. The ends were done on the miter saw. After getting it wrong the first time (see above), I took these off, recut the ends, and attached with glue and screws through the bottom. The bottom of the frame is not very level as you can see in the photo, so I am hoping that these add much needed stability.
Carving the handle
I had tested the press screw with a piece of 2x4 that I carved a spot for a nut into, but I wanted the handle to be a little more ergonomic than that. I started the handle by freehanding some curves (well, tracing part of the bottom of the 5-gallon bucket) into each end, and took a 1-1/2" chisel to pare down to the line. I had to cut a few relief cuts to help, trying various saws. I found the wide-kerf rough-cutting one that came with my cheap miter box was the fastest at this, but I also overshot a few times.
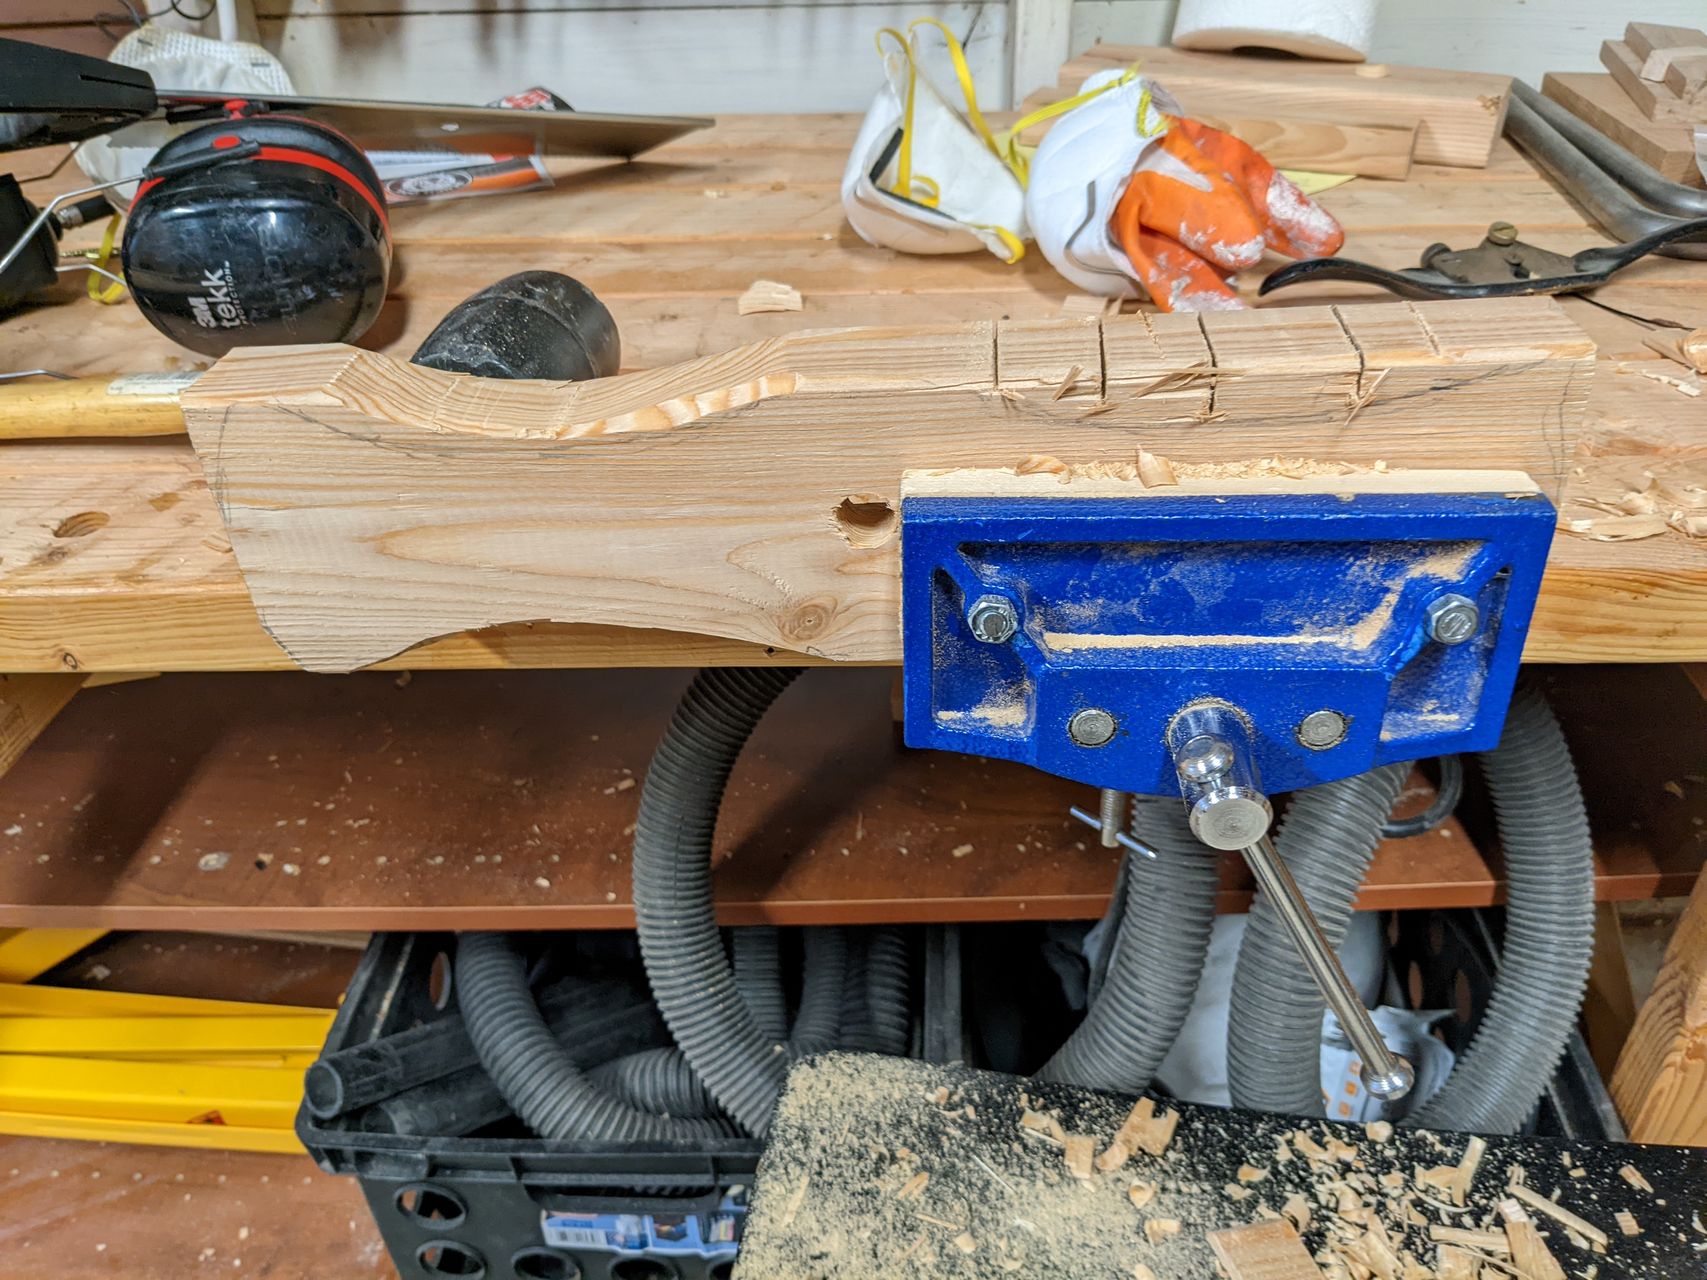
To clean it all up, I took a belt sander clamped to my workbench and worked over all the surfaces I had carved with 100 grit sand paper before applying paste wax.
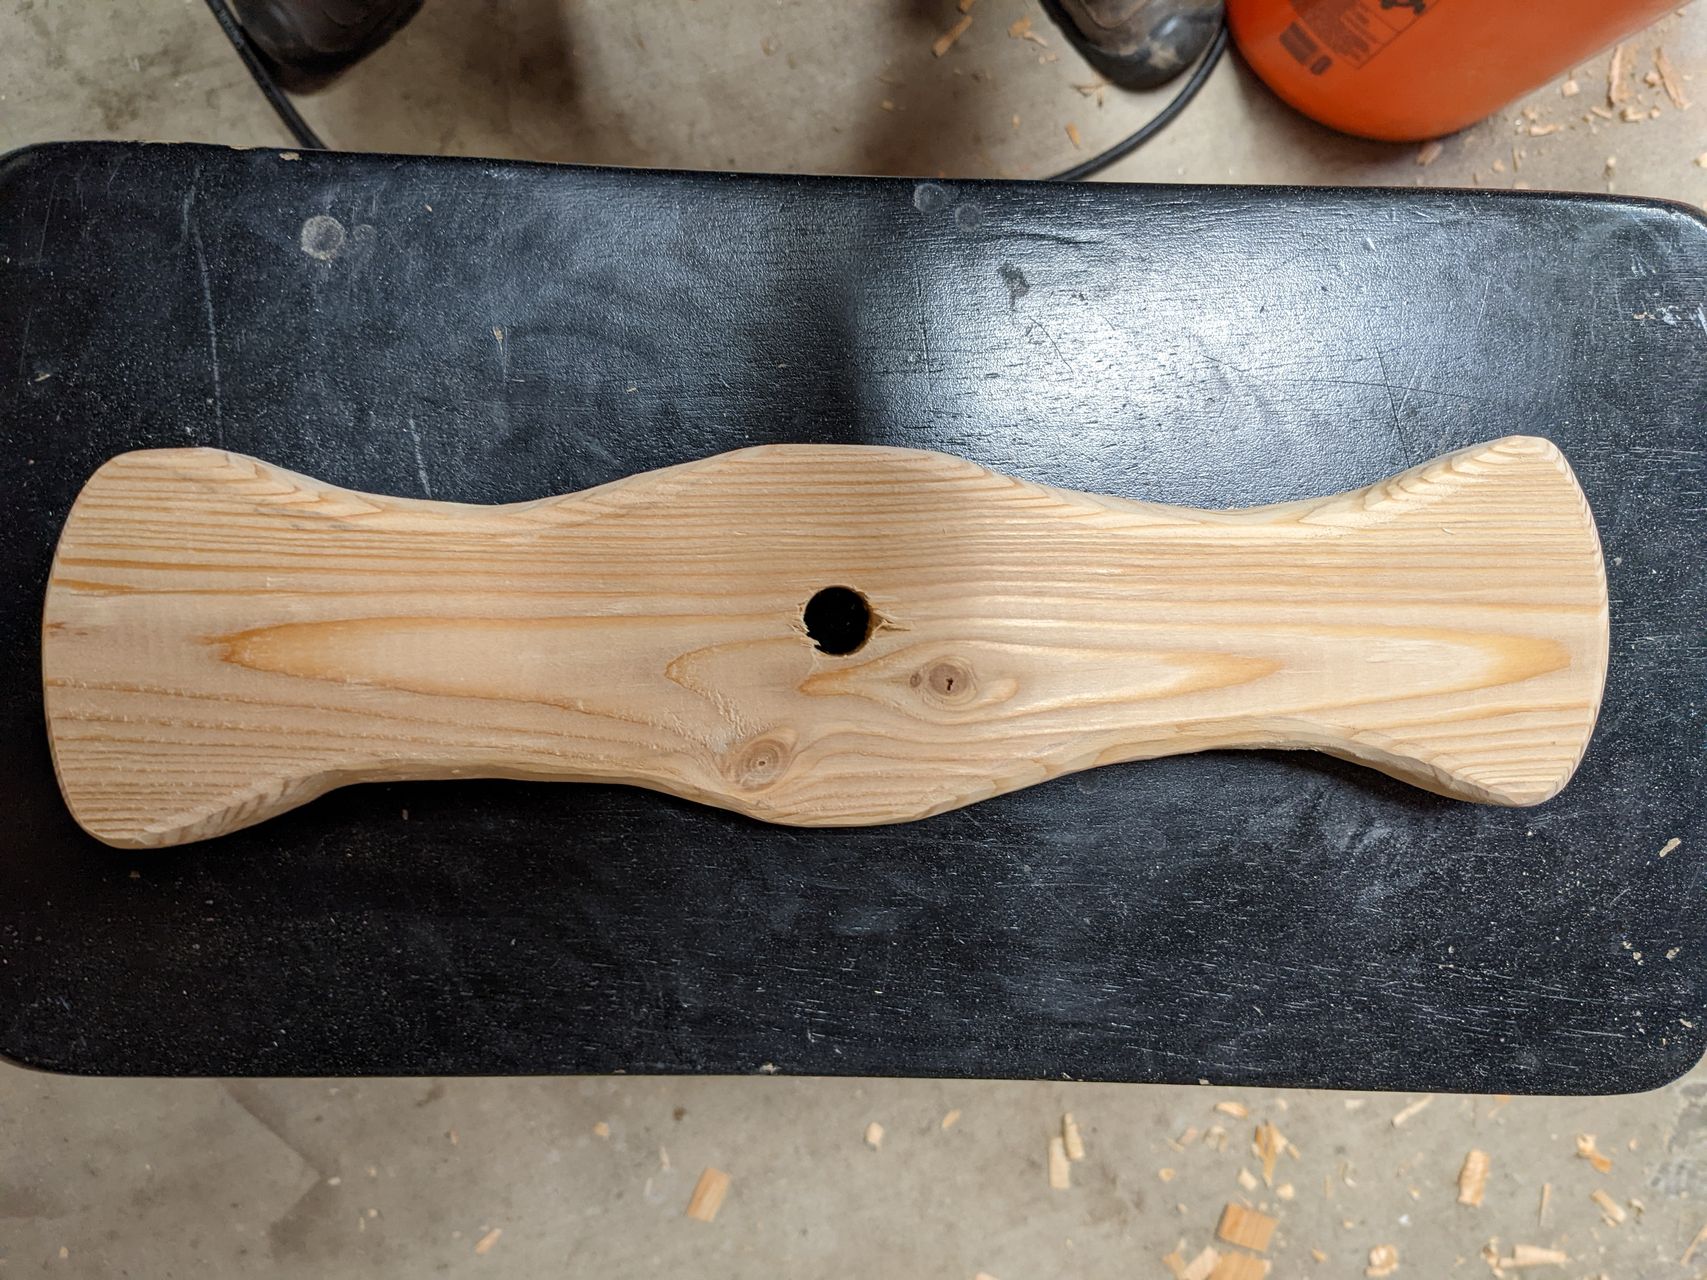 Finished press handle.
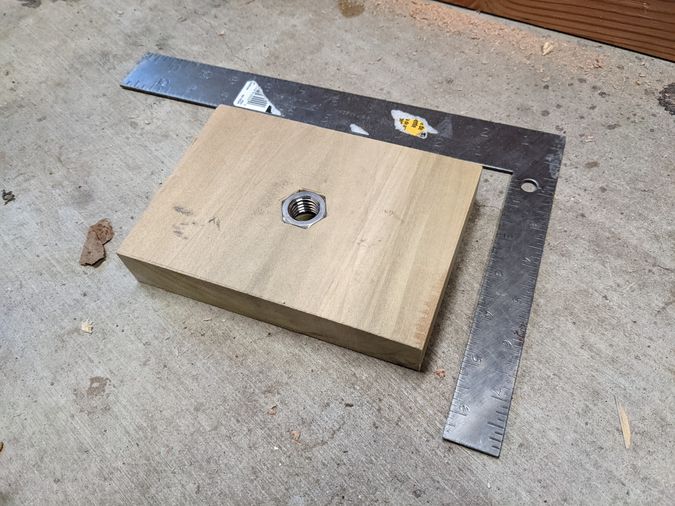
Pressure plate
Attaching the pressure plate to the end of the screw was something I thought about for a while, and after I test this I am open to redoing it.
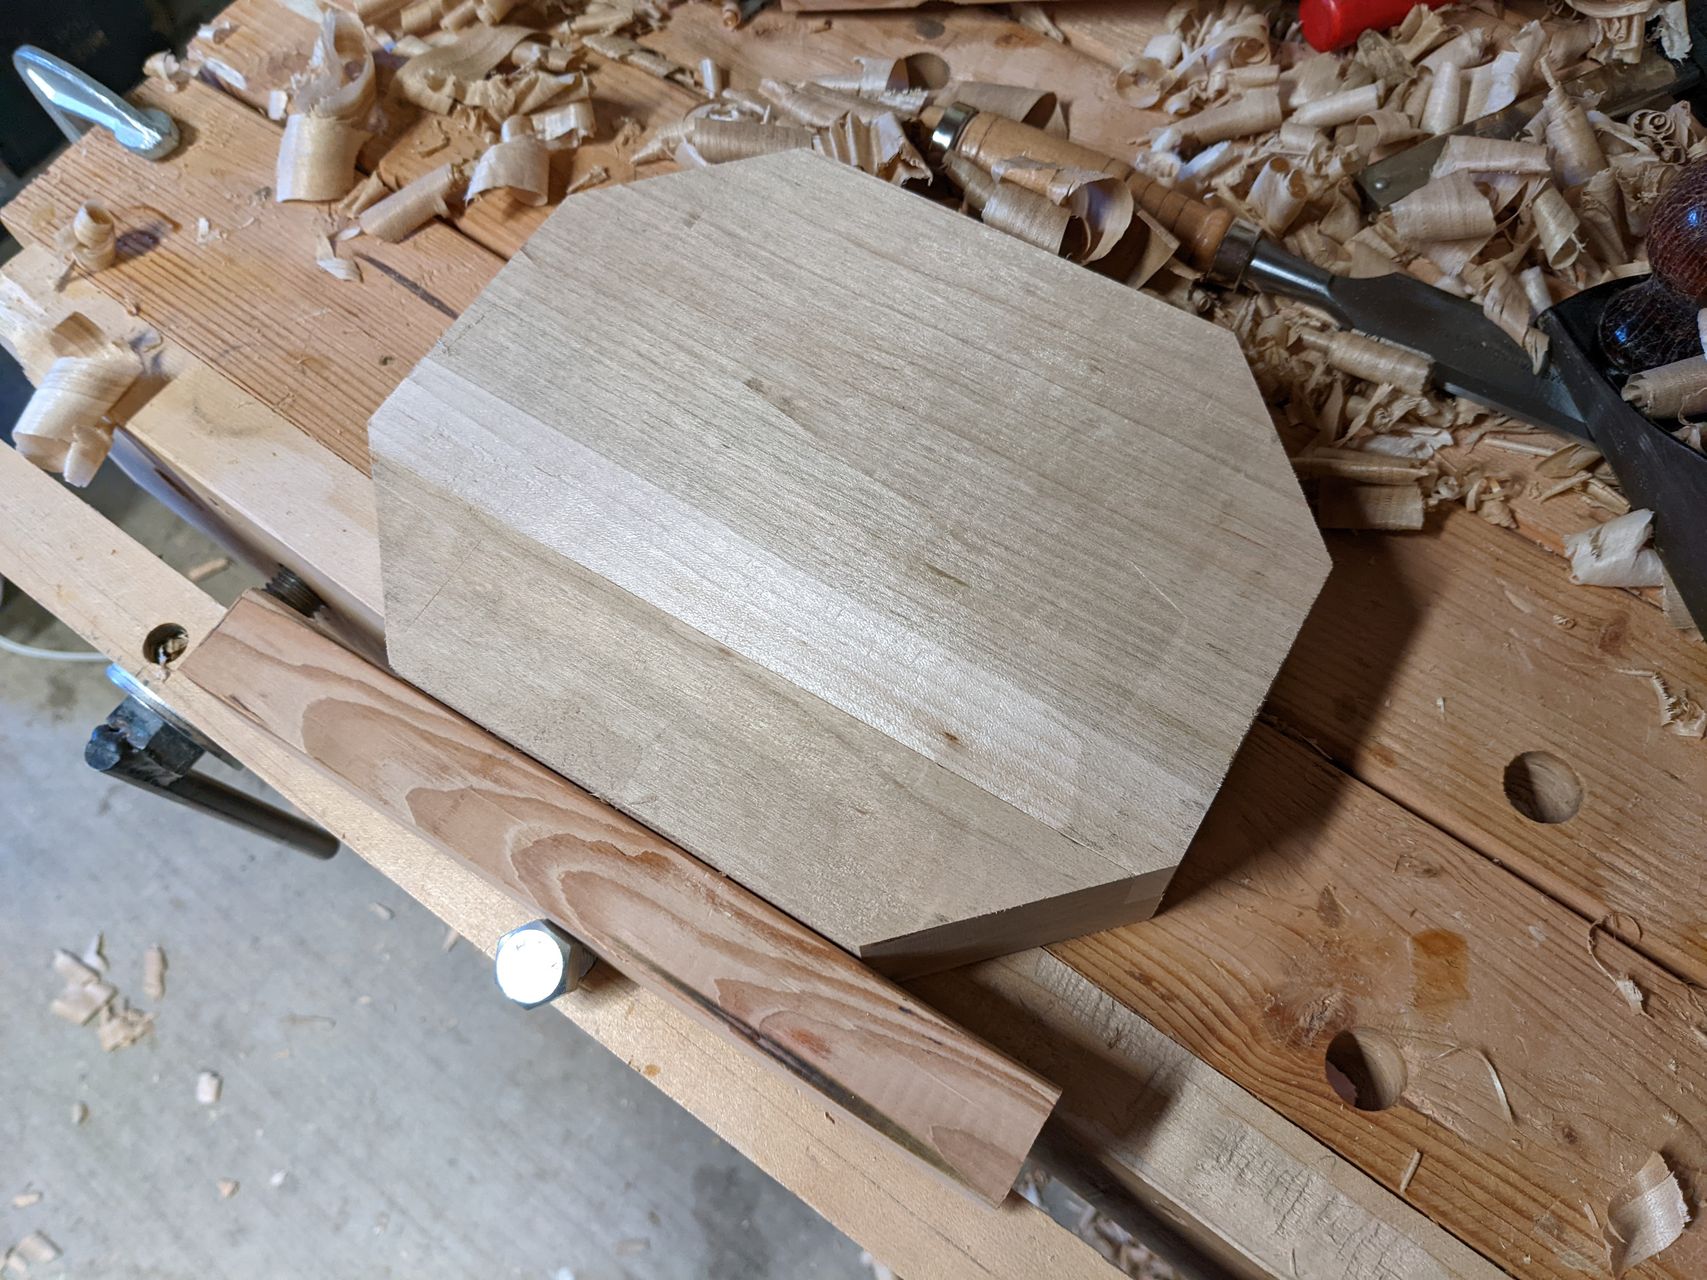
I laminated a few pieces of hard mape that were in my scrap pile together to create a piece of wood that I think will withstand the pressure that I will need to apply to this.
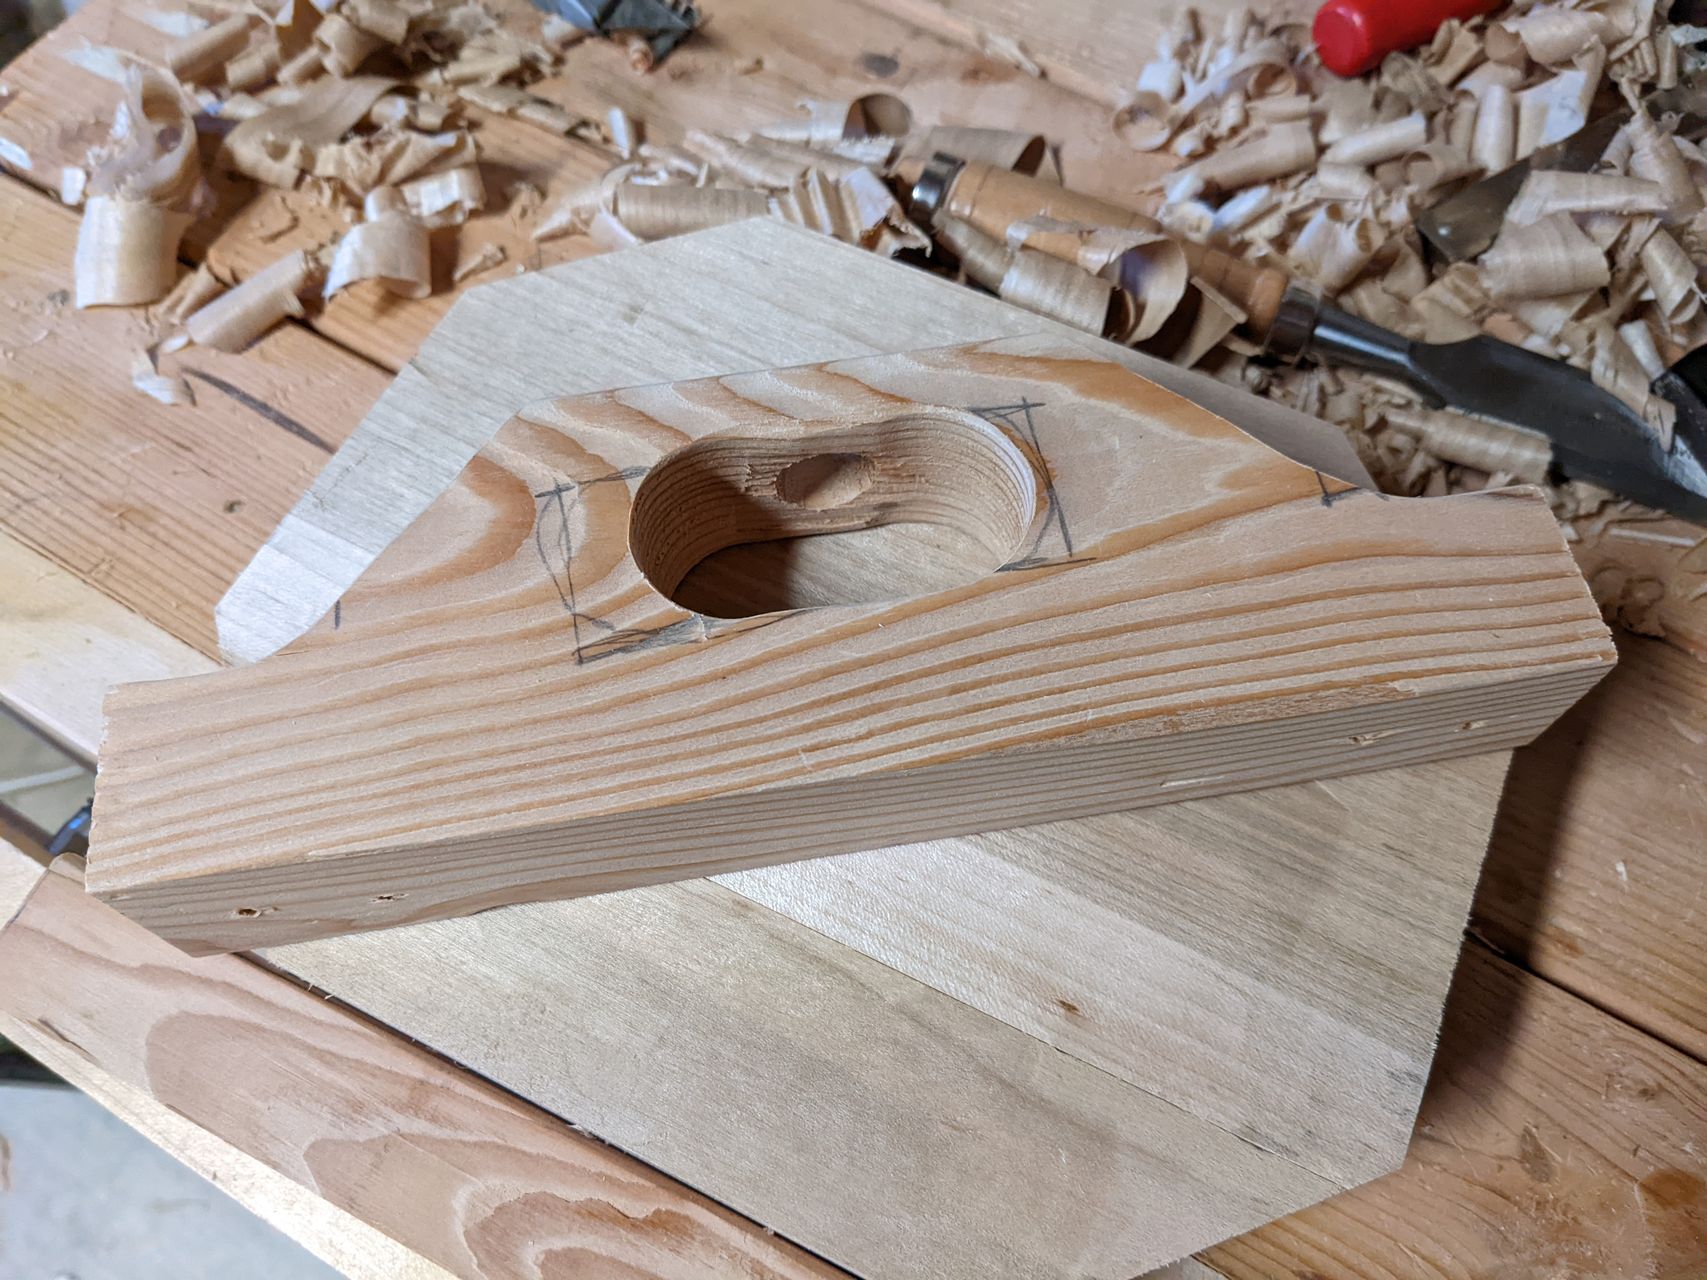
I had originally planned to drill a hole for the screw to sit in, and place the plate under the screw with the hole using pressure to hold it in place. This would make it a little messy and difficult to retract after each presssing, so I decided to make a yoke to hold the end of the screw. This also let me add about an additional inch of depth or more if I count not needing to go in the hole.
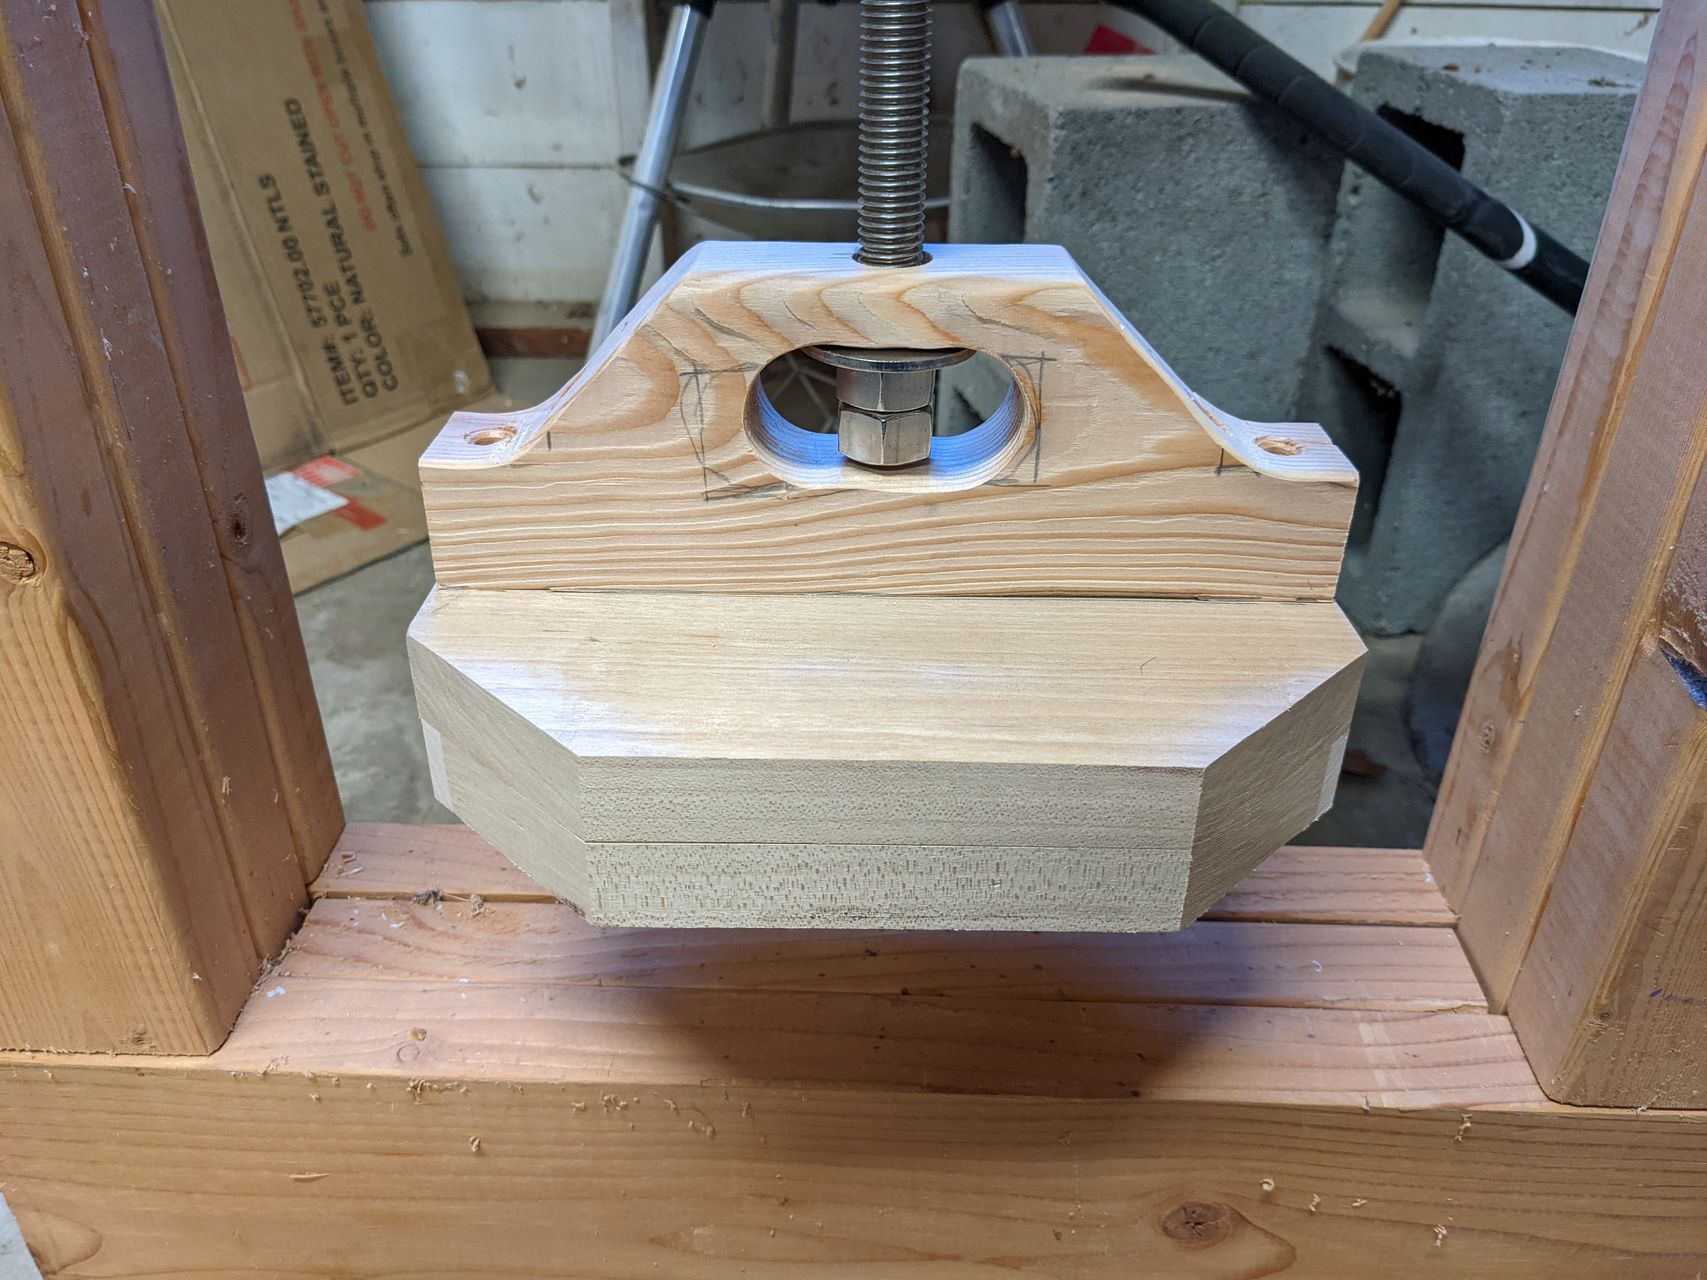
The yoke was made from a piece of pine 2x4 using a forstner bit to drill out the hole for the nuts to freely rotate in. I made sure there was enough space to get a wrench in to tighten the nuts. I might add a metal plate to contact area below the screw if I find that it is damaging the wood. I am also a little worried that if the plate gets stuck the yoke won't be strong enough to pull up on and will break near the top where the screw goes through it.
I pre-drilled two counter sunk holes on each end of the yoke and screw it onto the pressure plate.
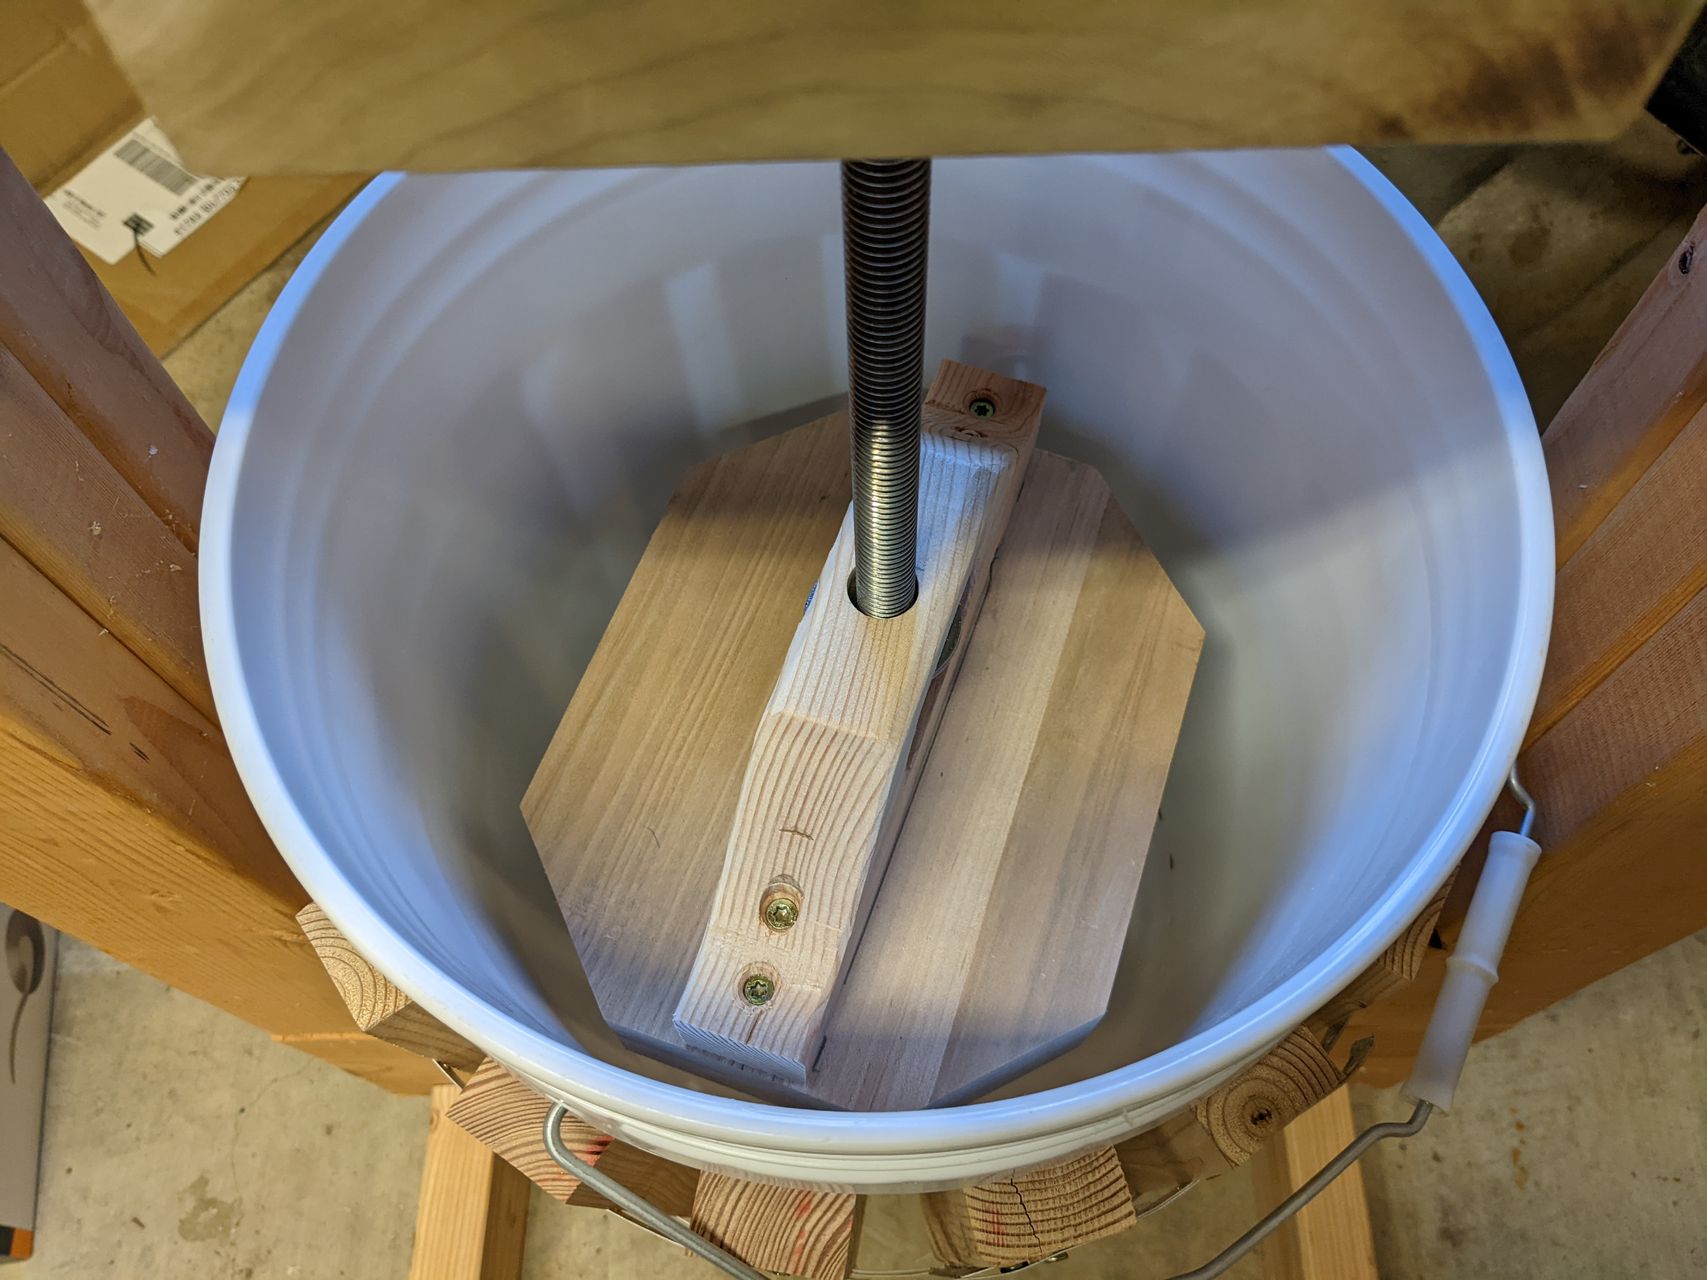
I test fit the whole assembly, it looks like the plate is just small enough to travel to the bottom of the bucket. If the two sides with wider gaps are too big, I'll have to make a new one, but it should be easy to replace if I want to keep the yoke or plate.
The plate will need to have some kind of finish applied to it. I will probably use the mineral oil and beeswax mixture that I apply to my cutting boards, as it is food safe and won't go rancid.
Drain
To go under the bucket, I drilled a large hole in one end of a rimmed cookie sheet. I think this will work well to collect the juice and drain it into a bucket or funnel. I won't attach this piece to the frame so that it is easy to take off for cleaning or to replace if it doesn't work well.
Future steps
Now that I have the press finished, I need to aactually press some fruit. I have five gallons of apples fermenting in a mini-fridge at the moment, which will be a good first test. Following that, I know several friends with other fruits that I've discussed fruit wine making with before. I'll let you all know how that goes.